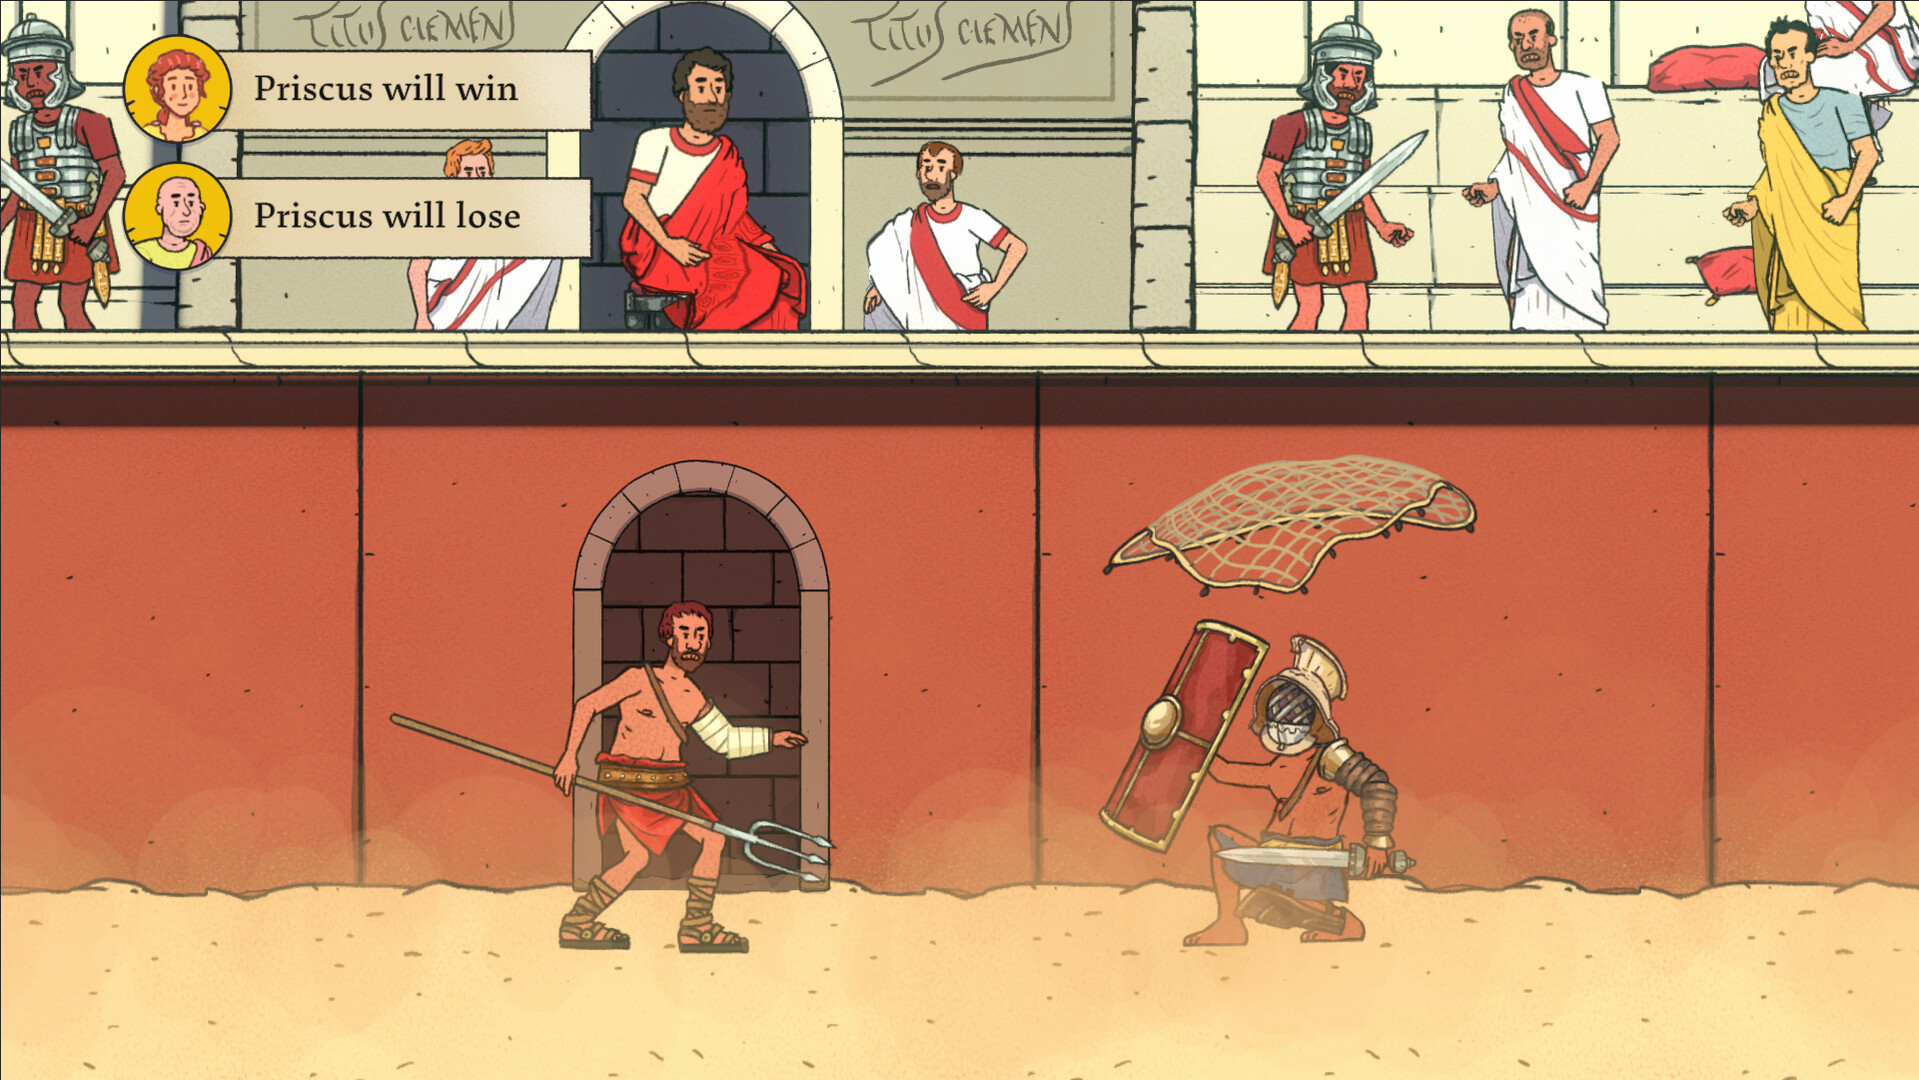


Resident Evil HD Remaster walkthrough, puzzle solutions & more

You have now entered the world of survival horror, and you’ve picked the Godfather of them all – the remake of Resident Evil. Below, we’ll walk you through the whole game from start to finish.
However, in this Resident Evil HD guide, we won’t be telling you to pick up each piece of ammo and health. We’ll keep the focus on key items and locations to help you get from A to B as quickly as possible. There may be exceptions at times if required. What we will say is to be sure to frequently check your map, as if a room or area is in red, it means there’s an item you’ve missed/are still to pick up.
So, in each new room, make a habit of clearing them as you go, returning to your item box to stash things as you need. But for the sake of this guide, we’ll be focusing on puzzle solutions, where to go, and what to do. We won’t be mentioning every zombie or enemy either, but we will advise on bosses, if an enemy is part of a wider environmental puzzle, or if we feel it’s relevant. So scan every room for danger and assume there will be a monster when you enter a new area – as there usually is.
This Resident Evil HD walkthrough is written with Jill in mind on Normal difficulty. While there are subtle changes to both Chris and Jill’s scenarios when it comes to cutscenes, partner characters, and events, the game is mostly unchanged. So the solutions below will work for either character. However, if we feel a difference needs clarification, we’ll be sure to add it. Okay, get ready to enter the world of survival horror.

Spencer Mansion (Part 1)
Exploring the Spencer Mansion makes up roughly the first 40% of the game, so get ready to see a lot of these dark hallways.
Prologue
Once you’ve enjoyed the stellar acting, you’ll find yourself in a dining room with a ticking clock. Walk past the table on the right, and you’ll see a typewriter. This is how you save your progress. Be warned, you’ll need an Ink Ribbon item to do so, and this is a finite resource even on Normal difficulty. The game gives you enough to save when you need to, just be mindful not to spam save. Instead, try to do so when you’ve made some meaningful progress.
You’ll notice Barry examining the floor, and there will be an Emblem on the wall in front of him. Ignore this for now and make your way through the door on the right – you’re about to meet your first zombie. In the hallway, turn left and watch the grisly cutscene. As we’re playing as Jill, you’ll have a gun and a knife, so you can fight and kill the zombie if you wish, but we’d recommend turning around and running back to the dining room instead.
While zombies can’t go through doors normally, they do in a few scripted events, like now. The zombie – whether you killed it or not – will follow you into the dining room, and Barry will shoot it for you. This is why it’s best to save your ammo, as this zombie gets shot by Barry anyway. Once you and Barry leave the dining room, the zombie will get back up and flee back to its hallway, awaiting your return.
Fun fact: this zombie can be killed four times before it actually dies. Once by you, once by Barry, again by you, and a fourth time when it resurrects as a Crimson Head. Our advice is to skip the first fight, kill it when you return to the hallway, then burn its body to stop it mutating – but more on Crimson Heads and burning bodies later.
For now, head back into the Main Hall to rendezvous with Wesker. He’s not there. You’ll need to run around and behind the staircase to look for him. Then a cutscene will play out, Barry will pass you a Lockpick, and the exploration of the mansion can begin.
Exploring the Spencer Mansion
Your goal now is to explore the mansion and unlock its doors to progress the story. From here, we’ll succinctly guide you through the best path, offering any practical advice, puzzle solutions, and warnings as we go.
The first thing to point out is that there’s a door in the middle of the staircase that leads outside. The path leads to a crypt, which serves as a hub area for the Mansion’s main puzzle. You’ll need to find 4 Death Masks and place them on 4 statues before you can leave, but first, you’ll need to unlock the crypt by finding an item known as the Golden Arrow.

Head back through the Dining Room and take out the zombie from earlier. Investigate Kenneth’s mutilated body and head past it through the door. You’ll be in a hallway with a birdcage. Go up the stairs and enter the door. You’ll spot a zombie in the mirror, so put him down and keep on moving until you see the Golden Arrow sticking out of a statue. Grab this and head through the door.
You’ll be on a balcony now above the Dining Room. Run around to the other side and push the statue off the edge. It’ll shatter, and you can collect the Blue Gem when you return to the Dining Room. Now, head to the crypt from earlier and examine the Golden Arrow in your inventory to make it become the Arrowhead. Place it on the angel relief above the crypt, then head inside.

You’ll see four statues that need Death Masks and a big metal coffin hanging in the air. Ignore all this for now and pick up the Book of Curses. Examine the book to find a key. Examine this to identify it as the Sword Key. Now you can start unlocking some doors!
Sword Key onwards
Head back to the Main Hall and go through the double doors opposite the Dining Room. Do not leave this room the way you came in, as doing so will lock you out of the shotgun for a while. So, no going back to the Main Hall for a little bit.
You’ll see a statue in the middle of the room, but before you push the cabinet to reach it, go into the alcove and dispose of the zombie (note: this one won’t resurrect as a Crimson Head later). Grab the map and go through the door.
Be warned: When you return to this hallway, you’ll be ambushed by zombie dogs jumping through the window. You can also find items by pushing the cabinets in this hallway. Head through the door on the other side.
Use your Lockpick on the metal door, pick up the Chemical, and go back out to the hall. Now go into the bathroom and drain the bathtub. Jill will kill the zombie in a cutscene, but take all the items from this room and never return. That way, when the zombie resurrects as a Crimson Head, he’ll be trapped there.

Go through the next door after leaving the bathroom and through the square-shaped room into an office. Take the shotgun and leave when you’re ready. Unhooking the shotgun has triggered a trap.
If you’re playing as Chris, you’ll need to return the shotgun and replace it with a broken one later. But if you’re Jill, just check both doors, and a cutscene will play out where Barry saves you and says his legendary line about a “Jill sandwich” – and yes, it’s canon.
Keep exploring the hallway you’ve been in, and go through the double doors and through the door on the left. You’ll be in a hall with a staircase and a room on the right. This is your first Safe/Save Room, so head on in, save your progress, and manage your items. These magic item boxes contain all your items, and they move from box to box, so don’t worry about leaving things in one place.
Beware: the doorknob on the hallway door (on the first floor) will break after two uses, forcing you to go the long way around. So, avoid this door and try to go around it unless there’s no other choice. The game does this to force you through a dangerous bit later.
Note: There’s a can of kerosene in this room and a Fuel Canteen. You can fill this with fuel and use the Lighter to set dead zombies on fire. This will stop them from resurrecting as even more dangerous Crimson Heads. This won’t happen for a while yet, and you won’t get enough fuel to burn every zombie body, so prioritize the ones on key routes and where there are 2 dead zombies in one area – as 2 Crimson Heads is always a bad time.
Don’t worry about the dead zombies in rooms you’ll never need to back in again. Just leave these guys trapped in there to save fuel and ammo. If you have any items in these rooms you need to still pick up, do it sooner rather than later, as all the zombies you killed will start getting back up again shortly. The good news is, once you kill a Crimson Head, they’re dead forever.
Once you’re done in the safe room, go up the stairs and use the Sword Key on any locked doors; others will need different keys, but this will open the first batch. In a room close to the top of the stairs, pick up the Wooden Mount. Then enter the small office and get the Dog Whistle and Lighter. Now you can start burning dead zombies.

More kerosene can be found in other save rooms (but not all), so our advice is to do a sweep of the dead zombies you want to stay dead now, returning to fill your canteen when you need to.
Continue to explore the hallway where you found the Lighter and unlock the door on the other side of it. You’ll be in a cosy-looking room, light the fire with the lighter, and examine the Wooden Mount. You can then use the item that comes from it above the fire to unlock the 2nd Floor Map.
When you return to the Main Hall, Barry will appear and give you some acid rounds for the grenade launcher. You don’t have that gun yet, so put those in your item box and be on your merry way.

Finding the Armor Key
Head back to the balcony above the Dining Room and unlock the door furthest from you with the Sword Key. You’ll be in a hall with a staircase and two zombies, kill them and burn at least one of them, or both, as you’ll be coming this way a lot.
Use the lockpick (or a Small Key if you’re Chris) to open the nearby door and retrieve the Battery Pack and Broken Shotgun. You can leave this in your item box and ignore it as Jill, because you already have the shotgun, or use it to get the real shotgun from the trap as Chris.
Now leave that room and go down the stairs to find another save room. Make sure you have the Dog Whistle in your inventory when you leave. Remember this save room, as you’ll need to return here for Serum twice in the near future.
So, going forward, this will be the Serum Room. There’s a corpse outside this room who’ll rise from the dead when you come for the Serum, so burn him to avoid that headache later.
Now go back upstairs and unlock the metal door with the lockpick. You’ll be outside on a terrace. Now blow the dog whistle and prepare to fight two ambushing zombie dogs, kill them with the shotgun, and retrieve the Collar. Examine this, and you’ll find you have a replica Armor Key. Naturally, we’re going to use that to obtain the real Armor Key.
From here, go back to Kenneth’s corpse, where you met your first zombie, and go through the door past the body. Keep going through the next door and up the stairs; the crows won’t attack, so ignore them. Go through the next door, and you’ll find yourself in a suit of armor-themed puzzle room.

You’ll be able to pick up the Armour Key from the end of the corridor. This will trigger a death trap, so to avoid becoming mincemeat, replace the fake Armor Key where the real one was and leave safely.

Armor Key onwards
Now you can start unlocking doors with the Armor Key. Start at the door on the upper east side of the Main Hall and head outside. You’ll see a fallen STARS member holding a Grenade Launcher. Take it and take the other items from the area. Once you take the Green Herbs, your fallen comrade will zombify and attack you. Put him down and leave the area.
We recommend saving the game now and preparing your inventory for a boss fight.
Meeting Richard

After killing Forest, getting the Grenade Launcher, and saving, use the Armor Key to unlock the northeast door in the Main Hall. You’ll meet Richard, who’s been poisoned, so rush to the Serum Room to get some for him. Make sure you do this without being distracted by other tasks, or Richard will die. You’ll want him alive to help you with something important later.

Leave Richard to recuperate and explore the nearby rooms where he sits. One of the rooms will need to be illuminated by candles using the Lighter. Now push the shelf toward the camera and beware of the zombie who lurks behind it. Kill the zombie and take the Musical Score.
Make sure you’ve got everything you need from this room and never return, that way when the zombie wakes up as a Crimson Head, he’ll be no threat to you.
Now go through the metal double doors using the armor key in the corridor before the room where Richard is. You’ll see a puzzle to solve, and if you get it wrong, poison gas will flood the room and hurt you.

To solve the puzzle, push in the knights in this order: Spear, Axe, Shield, until they click into place. Once the puzzle is solved, pick up the Jewelry Box and examine it to find your first of four Death Masks for the crypt outside.
Head back to the first save room to see that Barry has left you some supplies, save your progress, and leave.
Finding the Shield Key
You’ll notice that the Spencer Mansion has far fewer locked doors than it once had, but a bunch remain. Go up the stairs from the safe room and unlock the door to the left at the top. Unlock the door on the left with the lockpick and enjoy some more Barry moments. Oscars all around. Once the cutscene is over, you’ll notice two display cases full of bugs. Take the Fishhook and combine it with the Lure of a Bee. Now pick up the Bee Specimen.
Put the combined Lure and Fishhook in the left display case and place the Bee Specimen in the other. Then press the switch to complete the puzzle. You’ll be attacked by the Bee as it comes to life. Just avoid it, pick up the Wind Crest, and get out of there.

Use the Armor key on the locked door near where you found the Broken Shotgun (near the Serum Room). You’ll see a plant in the fountain, and yes, it will attack you. But it also blocks your path. So go over to the water pump and use the Chemical item you picked up earlier.

It’ll ask you to turn the handle, choose the red side, and make sure you don’t turn it to the green side. Red will make it kill the plant. Do this and walk away, as setting it green will kill all the green herbs opposite the plant, and that’s a waste of perfectly good herbs. Once the path is clear and the plant is dead, go behind it and take the second Death Mask.

Go back to the save room and do your thing, then go through the other nearby locked door with your Armor Key. This is the “Itchy Tasty” room, if you know, you know. You’ll be ambushed by a zombie in the closet, but this room doesn’t offer any key items, so take the supplies, kill the zombies, then leave them to turn into Crimson Heads.

Now go back to where Barry was examining blood at the start of the game, and if you haven’t already, take the Wooden Emblem from above the fireplace. If you haven’t unlocked the nearby door with the Sword Key, do so now and discard it. It’s a pointless room, but you’ll be rid of that key. Now go back to the hallway and unlock the first door on your left with the Armor Key.
You’ll see a large piano, go around it, and push the shelf to find the Moonlight Sonata Cover. Combine this with the Musical Score and use it on the piano. Who knew Jill was so talented?

This will open a secret passageway, and you’ll be able to pick up the Gold Emblem. Put the Gold Emblem above the fireplace in the Dining Room and approach the clock after the short cutscene. Set the clock to six o’clock and pick up the Shield Key.
Yawn boss fight

Remember when Richard told you he was poisoned by a snake? It’s time to fight the big infected serpent. Save your game, grab your Grenade Launcher, and go to the room above some stairs beyond where Richard sits. Look out when approaching it, as the zombie you killed earlier may be a Crimson Head now if you didn’t burn him.

Use the Armor Key on the door and be rid of it. You’ll see a cutscene and be thrown into a fight with the snake. Blast it with grenades until Richard comes to help you. He’ll start shooting it with an Assault Shotgun, doing massive damage – this is why we saved him. However, he’ll eventually be killed, leaving you to finish off the snake. It’ll only take a few grenades on Normal difficulty, then the beast will slither away. Round two will happen later.
Finding the final Death Masks
So for now, grab the third Death Mask and Richard’s Assault Shotgun and leave the room. If you were poisoned by the snake, go back to the Serum Room and cure it. But be warned, this is when the body outside that room will rise as a Crimson Head, so we hope you burned it when we said. Be sure to save.
Now, go through the double doors on the east part of the Main Hall and follow the corridor where the dogs attacked you. Go through the door and into the next hallway. Four zombies will burst through the windows. You can avoid them if you’re quick, but one will follow you into the next area. Kill it and burn it.
Our advice is to use the shotgun to kill the other 3 back in the other room and burn as many as you can. That’s because you’ll be coming to and from this area, and nobody wants to be dealing with that many zombies or Crimson Heads. Once this threat has been eliminated, unlock the door on your left with the Shield Key.
You’ll be in a gallery full of ravens, and as you’ve likely guessed, if you mess up the puzzle, then the birds will attack. So do the following:
- Change the light on the first painting to Orange.
- Go to the other side and turn the Yellow painting to Green.
- Turn the Red painting to Purple.
You should now have each item from the painting at the end of the hall corresponding with the color of the others. Green Crown, Orange Bracelet, Purple Necklace. Now press the switch. The wall will rise, and you’ll be able to go outside and find the fourth and final Death Mask.

Now go to the nearest save room, save your progress, and retrieve the other 3 Death Masks and the Wind Crest from the item box. If the doorknob isn’t broken yet, go through that door to head back to the Main Hall. You’re going to have to deal with those 3 zombies again – so we hope you burned at least some of them, otherwise they’ll be Crimson Heads now.

Go to the crypt and place all 4 Death Masks on the statue that corresponds with them. The big metal coffin will drop, and a Crimson Head will attack. Blast him with the shotgun and retrieve the Stone and Metal Object from inside the coffin.

Now go back to the hallway where the zombie followed you and down the dark hall opposite the room with the painting puzzle. Go through the door to an outside area and place the Stone and Metal Object in the slot to unlock the next area. You’ll be ambushed by a zombie dog, but that’s what shotguns are for.

Path to the shack
You’ll be in a storage shed, and after the cutscene, go down the stairs and through the door on the right. You’ll see a spinning red weather vane, make it point West, then keep going and make the blue one point North. This will make the dog statues by the big gate face away from each other, opening the way.

You’ll be in a graveyard full of hostile crows. These guys can be avoided, but if you have the handgun ammo, you can kill them to make your life easier. Put the Wind Crest in the grave on the right and take the Moon, Star, and Sun Crests from the opening. Examine each and press the switches, then all you’ll need to do is put them in the grave on the left to unlock the Magnum. Now we’re talking!

Now keep going past the graveyard, and you’ll find yourself on a woodland path leading to a shack. There will be a few annoying cutscenes where Brad tries to contact you; guess he’s not a chicken after all. Head into the shack and prepare for a scare. Save game and make sure you have your shotgun or Grenade Launcher handy. Go to the back of the shack and pick up the Square Crank. You’ll be ambushed, and a cutscene will play out.
Lisa Trevor boss fight
When you wake up, you’ll find you’ve been taken prisoner by a mutant. This is Lisa Trevor, a rather tragic figure, but a dangerous one. In truth, this isn’t much of a boss fight, but Lisa stands between you and the exit. A few shotgun or grenade blasts will stun but not kill her. Once she’s down, run for it and get out of the shack. Don’t waste more ammo than you need to; the priority is getting past her.
Once you’re out of the shack, do not go back in. But you’ll be safe for now. However, you’ll meet Lisa again later. With the Square Crank in hand, go back to the tool shed to take the other door. There’s now a lone zombie on the wooded path, but try to run past his gormless ass. All killing him will do is create a Crimson Head to deal with later, while this guy will just stand there staring at a tree for the rest of the game if you just ignore and avoid him.
Go through the double doors at the shed and get ready to blast 3 dogs. Go up the stairs and through the gate. You’ll be at a pool, go around, and use the crank on the box to drain the water. This creates a path; follow it until you reach an elevator you can take down.
At the bottom, you’ll be in a garden full of crows. You can avoid them or remove them, depending on how your ammo is going. We found it was easier to expend a few shots killing them, so we did not need to worry about them. Go around the waterfall and through the nearby gate.
Snakes will drop from the trees, but they can be easily avoided. They can poison you, so keep a blue herb handy or use a nearby blue herb pot. Now go through the door at the other end, and we enter a new chapter of the game.
The Residence
The Residence is a brand-new area full of even more fiendish puzzles and traps, but from here on out, every area you visit will be much smaller than the main mansion, so there will be fewer rooms to explore and unlock.
The first room you’ll come to is a save room, so save your progress and freshen up. Drop off the Crank, but you’ll need this again later. Grab the Lighter, though, you’re going to need it. On your way back, you’ll be attacked by a plant tentacle. You can push a crate over one of the holes in the ground, then use both boxes to avoid being attacked again.

Go through the double doors and look out for the giant spider. A well-placed shotgun blast should do the trick, but the handgun is also effective. These things can poison you, but they’re not a threat from a distance.

There’s another spider on the side wall up the stairs, just auto-aim at it and unload until it drops dead. Now this next puzzle is different in each playthrough, but it’s simple. Just use your lighter to light the 3 oil lamps, and make a note of the eye symbol each one displays beneath it. The nearby pool table has a number corresponding to each color, so make a note of this too. Later, you’ll need to solve a puzzle and match the eyes with the colors and numbers.

For example, the Red Lamp may be 6, with an eye with no eyelashes. Our advice is to screenshot the pool table and all 3 lamps to avoid backtracking. Pick up all the items, including the Red Book. You can’t do much with it yet, but you’ll need to put it on a shelf shortly to solve another puzzle. Return to the safe room and deposit the lighter and the Red Book.
You’ll see a map on the wall covering a hole, and you’ll see a dangerous beehive. You’ll need the map, so take it and just avoid the bees. If you move fast, they’ll not catch you. Enter the room labeled 002 after the cutscene. Once inside, go through the other door and into the bathroom. Take the 001 Room Key and leave. Ignore the zombie in Room 002 and leave it to head back into the bee-infested hallway.

Go to the door across from the save room called Room 001 and go inside. Ignore the hanging corpse and pick up the self-defense gun, which only has 1 round and can never be used again, and equip it. Now, enter the bathroom as you did in Room 002. Drain the bathtub and take the Control Room Key. Then immediately flee the room as the zombie wakes up. No need to waste ammo on him.
You’ll likely have heard a thud, meaning the hanging body has dropped to the floor and is now a zombie. Ignore him, too, as there’s no need to enter Room 001 again. Head back to Room 002 and blast the zombie with the self-defense gun. It should blast his head off, meaning he can’t come back as a Crimson Head. If not, though, you’ll need to burn him or just kill him again later.

Push the two shelves out of the way until you can see the ladder, go down, and push the boxes into the water to make a bridge for yourself. Enter the door on the other side and prepare to bite your nails.

Aqua Ring and sharks
Make sure you have the control room key, then run to the other side of the room. Two smaller sharks will come for you, but if you hang around and shoot at them, you’ll make yourself vulnerable to the larger shark. So just run for it and save your ammo. Use the control room key and breathe out.
Climb down the ladder and grab the Aqua Ring map, then look at the whiteboard to take note of what Valve number is written on it, either 1,2, or 3. Keep this in your mind or write it down. Now go to the console in front of the glass and press it.

The big shark will start attacking the glass to get to you, so move to the right and press the switch. The blast shields will come down, but get jammed. Leave the room and go into the hallway. Press the valve you noted on the whiteboard, then go back and press the blast shields switch again. This time they should work.

Now, press the original console to drain the water and kill the sharks. Now that the doors are unlocked, go down the hallway on the right. Go down the ladder and through the door, not the gate. The smaller sharks are no longer a threat, so just ignore them and save your ammo.

Follow the area around until you see the big shark (Neptune), go past him, and climb up onto the platform. He’ll attack and thrash around once you’re up there, but you’re safe. The Gallery Key will fall down by him, making it unsafe to grab. So, push the console into the water and pull the lever to electrocute him. Then, you can safely retrieve the key next to his body. Don’t worry about him attacking; he’s chowder.

With the Gallery Key in hand, go through the gate, up the ladder, and back to the place where you pushed the boxes. The water being drained means the box bridge is no longer available, but you can continue to explore the area through the gate.
While you can leave now and return to the Residence, it’s worth mentioning that when you run past the sharks, you’ll have run past a room on your left that you’ll need to return to later. This room contains the roots to the upcoming boss Plant 42, but we’re going to skip that boss and poison the roots instead.
For now, though, return to Roon 002, go save your progress, grab the Red Book, then go use the Gallery Key on the door by Room 002.
VJOLT and Plant 42 boss

In this new room, you’ll be chased by bees. Take the Insecticide off the dead body in the hallway and return to the hole where you got the Residence Map, use the bug spray, and kill the bees for good. Then return to the Gallery area. Go to where the beehive was and grab the Room 003 Key.

Unlock Room 003 and place the Red Book on the shelf. Reorganize the books so they’re in the shape of a woman sunbathing. The shelf will then move out of the way, showing a hidden passage. Ignore this for now and go out to the hall again.

Go to the door with the panel. It’s now time to input the color, eyes, and numbers combination you jotted down earlier from the room with the spiders. This is random every time, so if you need to find out again, go back to that room.
Once inside, we’re going to concoct a poison brew fit for a twenty-foot carnivorous plant. It’s worth pointing out that you can fight Plant 42 instead. But if you want to save ammo and kill it through poison, that’s the easier play.
In the room, you’ll be faced with two big jars of chemicals and some water. Pick up the empty bottles and do it in this order:
- Take some water and UMB no.3
- Combine UMB no.3 with Water to make NP-004.
- Take some Yellow 6.
- Combine NP-004 with Yellow 6 to make UMB no.10.
- Take some Yellow 6 and Water.
- Combine Yellow 6 with Water to make UMB no.7.
- Combine UMB no.7 with UMB no.10 to make VP-017.
- Finally, combine VP-017 with UMB no.3 to make V-Jolt.
Now, go to the upper shark room and poison the roots. The empty bottles will be discarded when you do.

Go into the secret passage in Room 003 and let the events with Plant 42 play out. Take the Helmet Key from the fireplace. You’re now done with the Residence, and it’s time to return to the main mansion. Be sure to save.

Spencer Mansion (Part 2)
Your task now is to return to the main mansion and open each of the remaining doors using the Helmet Key. Look out for new dogs and zombies and your way back, but more importantly, look out for a new enemy: Hunters.
These bioweapons are smarter, faster, and stronger than zombies and sometimes hunt in pairs. A couple of shotgun blasts can put one down, but they’re fast, so always be on your guard. The good news is that many areas that were once home to zombies or Crimson Heads have now been cleared out by the Hunters. The bad news is you’ll need to deal with the Hunters.
Any areas that aren’t home to Hunters, like obscure rooms, will still be home to any zombies or Crimson Heads you left alive. However, some rooms, like the bathroom near the corridor where 4 zombies ambushed you, have had their doors kicked down, and any zombies or Crimson Heads that were inside have been slaughtered by the new foe.
However, our return to the mansion is mostly a brief pitstop. First, go to the west side and unlock the door upstairs above the save room. You’ll be in a room with a stuffed Eagle tracking your movements. The goal here is to move the two dressers underneath the two other stuffed heads.
Then, rush across the room, climb up, and take the Red and Yellow Gems before the Eagle has time to track you. Do this for each head, then flip off the bird as you leave with the Gems. Now go downstairs and go to the hallway before the room with the fire/map puzzle you solved earlier. Retrieve the Blue Gem you got from pushing the statue in the dining room at the start of the game (remember that?) and go into the tiny room with the Tiger Statue.

Put the Blue and Yellow Gems in the Tiger Statue to get some Shotgun Shells and an MO Disk. You’ll need this later. DO NOT put the Red Gem in the Tiger. That has a different purpose and will just get you covered in snakes.
Go back to the Main Hall and unlock the door that needs the Helmet Key. Pick up the Jewelry Box, combine it with the Red Gem, and solve the puzzle (see pictured). Examine the Brooch; it unlocks to get the Emblem Key. This opens the study nearby on the 1F east side.
Go in and turn on the lamp to see what you’re doing. Pick up the Metal Object and stash it for now. Save the game and go to the room where you got the Armor Key. Run past the pedestal that has the Fake Armor Key and unlock the door beyond with the Helmet Key, and make sure you have your Magnum or Grenade Launcher handy; it’s time for Snake Fight 2: Infected Bugaloo.
Yawn boss fight (Part 2)
This slithering idiot is still mad at you after last time, and he’s digested Richard by now, so you’re on your own. Avoid his attacks and fill him with lead and/or grenades until he shrivels and dies. He’ll struggle to get you if you climb the ladder and blast him from above. But honestly? On Normal difficulty, we killed him with grenades before he had much chance to do anything.

He won’t take many shots from your power weapons, but he is annoying to fight with the shotgun or handgun. Pick up the Wolf Medal from the book once he dies. Put the Wolf Medal in your item box and go upstairs on the west side and unlock the locked door.
You’ll face a puzzle where you need to push a statue into the hole so it matches the one on the other side. The walls will close in on you, but the statue will keep you safe if you hide behind it. You can keep running back behind the other wall to hit the switch until the statue is in.
A path will open, and you’ll be able to head inside and grab the book, examine it to find the Eagle Medal. Now look at the grave and go down the hole. You’ll now be in the basement and need to deal with some spiders. Find the switch to restore power to the elevator. Go through the door, kill the zombies, and find the battery before riding the elevator.

When you come out, go and save your progress, put the Eagle and Wolf Medals away, and take out the Square Crank. By now, it’s time to head back to the garden, past the shed, where you drained the water. Make your way back there and put the battery in the hole.
Now use the newly working elevator to use the square crank on the water console. This will stop the waterfall blocking the entrance to the Tunnels, but now you can use the elevator to get back there without the water in the way. So ride the elevator back and enter the Tunnels.
The Tunnels
Once again, we’re in a new area that’s not as big as the mansion. The mission here is to find the stone bit for the second Metal Object so we can open the mysterious gate behind the staircase in the Main Hall – which, by now, should be the only thing left for you to do in the main house.
But we have some tunnels to explore first! When you get down the ladder, save your game and put away the Square Crank. This won’t be needed again, and anyway, soon we’ll be getting a shiny new Hex Crank! How exciting. Once you’re done freshening up, keep moving down the passage and watch the cutscene with Enrico. RIP, Enrico. Now take the Hex Crank from his body.

You’ll be ambushed by a Hunter when you go back, so be ready. Use the Hex Crank on the hole in the wall near the item box. Do it a few times until you can go left. Go through the door and check out the big boulder. Once you step away, it’ll roll towards you, so run into the alcove and avoid it. Nice one, Indiana Jones. You’ll need to do that again later.
The boulder was blocking a path that you can now go through. You’ll need to deal with an extra-large spider inside. The best thing to do is hit it with flame rounds for a quick kill. Once it’s dead, kill the smaller spiders from a safe distance. Pick up the knife and chop the web from the door, and go through. Use the Hex Crank again 3 times, and avoid another boulder; do exactly what you did before.
Lisa Trevor encounter

Now go through the door you can now reach. In this puzzle, you need to use the Hex Crank to push the chunk of wall to push the statue away from it, then push it onto the spinning tile so it’s facing away from the screen (like the other statue). Then push it into the slot. You’ll get the Cylinder for doing this. No, leave the area and go back to where the elevator was, approach the console, and pick up the Shaft.

Combine the Shaft with the Cylinder, then use the combination on the panel. Now type in the code 4231 and move on. Once the drama is over, you’ll be in a room with Lisa Trevor. Ignore and avoid her; don’t waste your ammo, as she can’t be killed. Even if you knock her out, she’ll get back up a minute later.
Ignore the switch on the other side of the wall and run through the unlocked door near it. Push the box onto the metal lift, then press the switch to transport it back to the room where the lift came down. Go back there, avoiding Lisa, and push the box into the trash compactor and activate it. Just down into the hold (it’s safe) and grab the Broken Flamethrower.
Now go to the switch in the room where Lisa is and press it. Now run right and follow the tunnel round until you reach the locked door. Place the Broken Flamethrower on the hooks and go through the door. Lisa can’t follow you, thank heavens.
You’ll find yourself in Lisa’s creepy private quarters after avoiding some snakes. They can only get you in the water and are easily dodged. Pick up the Jewelry Box, examine it to find the frame for the Metal Object. This is what we’re here for. So follow the path out of the lair, and you’ll be back in Lisa Trevor’s shack. It’s perfectly safe, so save and combine the Frame with the Metal Object. Also, retrieve the Wolf and Eagle Medals; you’ll need them soon.

You’ll now have a second Stone and Metal Object, just like the one you used earlier to access the shed. So, leave the shack and head back to that cursed main mansion. The gormless zombie may still be staring at the tree here, so either kill him or ignore him. If you killed him last time, he’ll be a Crimson Head now, and he’ll be all over you the second you leave the shack – don’t say we didn’t warn you.

Some other zombies have spawned in the graveyard. You may need to kill the one with his back to you, but you can probably run past them both. You’ll never need to come this way again, so don’t waste bullets or fuel. Take the original Stone and Metal Object from the hole that leads to the tool shed. This was the item you got from the crypt coffin.

Now with both objects in your inventory, go back to the Main Hall and behind the staircase. Place both objects in the holes and get ready for the final area of the game.

Secret Laboratory
If you’re playing as Jill, you’ll have a confrontation with Barry here that will be interrupted by Lisa Trevor. Jill will disarm Barry, but he’ll plead for his gun back as Lisa attacks him. You can either choose to let her kill the traitor or help your old friend and mentor. Now it’s up to you what you do, but both choices have implications.

If Barry dies, that’s it. You fight Lisa Trevor alone, and you don’t have his help against the final boss either. If you save Barry, he’ll stay true to his word and help you in two boss fights. Remember, Barry isn’t the real villain; his family is being held hostage, and he survives the events of Resident Evil in the canon ending. So, in our view, there’s no tangible benefit to letting Lisa Trevor kill Barry.

Your partner character will distract Lisa. What you need to do is avoid her and push the chained stones off the platform. This will open the coffin, revealing Lisa’s real objective and ending the fight. After the tragic and poignant cutscene, progress through the door and into the lab garden. Place the Wolf and Eagle Medals into the holes in the fountain and make your way underground into Umbrella’s secret lab.

This area is roughly the same size as the Residence. Save your game and juggle your inventory. Take out the MO disk, as you’ll need three to unlock the final part of the lab and save Chris/Jill (whoever you’re not playing as). You’ll find a second MO Disk before the stairs in the hall, scoop it up, and keep moving down them to Lab B3F.
There are a bunch of zombies hanging around the lab, so don’t forget to burn them after killing them, and you’ll be back and forth around these halls a few times. Luckily, there aren’t that many to worry about, even if they do return as Crimson Heads. Just be aware they’ll come back quickly, and you DO NOT want them running around later when you’re carrying some explosive material.
Go through the door on the right, and you’ll see some X-rays hanging on the wall. Pick up the X-Ray of Clark and Gail and add them to the board, putting the names in alphabetical order. Turn off the light, and you’ll be able to see the word “CELL” spelled out. Make a note of this for later. Leave the room and find the other room with the double doors.

Go in and enter “ADA”, “JOHN”, and then “CELL” as passwords into the computer. This will open some doors for you with “CELL,” allowing you to rescue Chris/Jill later. Oh, and yes, it’s THAT Ada the password is referring to. She’s been busy manipulating Umbrella researchers. Poor John, he’s one of the zombies you just set on fire.
You’ll see a door with 3 lights and levers attached; these will be opened one by one as we insert the MO Disks into what look like GameCubes. Enter the now unlocked room nearby and pick up the Slide Filter. Use the MO Disk Reader to open one of the 3 locks. You’ll need to find 2 more devices to unlock the others.
Now go back upstairs, enter the Visual Data Room, and pick up the next MO Disk. You can place the Slide Filter on a projector to get code 8462, then tap it into the code panel nearby. This will open the Editing Room, where you can find the Laboratory Key. Head back downstairs and go into the room to your left. You’ll now face a new enemy type called a Chimera. Luckily, a well-placed shotgun blast to the face takes care of these.

You’ll find yourself in a morgue and can use another MO Disk Reader. Now push the shelf out of the way to get back into the hallway. Go to the door on the right and save – this is important, as we’re about to do a rather risky bit. Use the Laboratory Key to unlock the boiler room and get ready to blast a lot of Chimeras.

Take the depleted Fuel Supply Capsule and go to the room on the north side to fill it with Nitro compound. Now you need to WALK, NOT RUN, back to the boiler room and insert the fuel into the generator to get the elevator working. This is why you need to make sure all Chimeras and Crimson Heads are gone before attempting it.

Put the Fuel Capsule back into the generator in the Boiler Room, then breathe out. Also, please go and save. You don’t want to have to redo that stressful part. Go through the other past the Boiler Room to find the final MO Disk Reader, unlock the last lock, and go through the next door to find a computer that’ll restore power to the elevator. Save, and tool up with your biggest guns, health, and ammo, as we’re about to enter the final showdown.

First, take the elevator and follow the path until the cutscene plays. You’ll now be facing the Tyrant – Umbrella’s ultimate bioweapon. Your partner character (if Barry’s alive) will be knocked out for this fight, so you’re on your own. Blast the Tyrant with grenades or magnum rounds, and move to the other side of the room, and repeat when he gets close. It won’t take long to make him fall. Just don’t let him get close to you.

After the cutscene, go to the door with the 3 levers the MO Disks unlocked and pull them all. Go down and rescue Chris/Jill and reunite with your partner character. If you’re playing as Jill, like we were, and you saved Barry, the 3 of you will now need to save, head to the lab entrance, and go through the previously locked door to the helipad.

If you’re playing as Jill and Barry died, remove the Master Key from you-know-who and use it on the door to get out. If Barry/Rebecca is with you, leave together.
Pick up any of the health and ammo on your way and get ready for the final fight. Tyrant isn’t done yet, but first we have a colleague to save.

Go back to the door with the 3 levers and open it after pulling them. This will allow you to unlock Chris/Jill’s cell, and the 3 of you can start making your escape to the helipad.
Go to the start of the lab area and go through the door you couldn’t access earlier. The electronic lock has been released this will be open. Pick up the fuse on the floor and put it in the socket to power up the elevator to the helipad.
Your allies will cover your retreat as monsters attack off-screen, but they’ll be right behind you.

Once you arrive at the helipad, use the Signal Rockets to alert Brad to your location. Your allies will return safely, but as soon as they do, the ground will be smashed, and Tyrant will attack again.

You’ll now have to battle the Tyrant again and be conscious of the 30-minute timers. If you have allies to back you up, this will be a big help. Remember, you don’t need to conserve ammo anymore, so let him have it with the magnum, grenade launcher, all of it.

He’ll be faster this time, so take a potshot and move before he attacks. If you stand in one place too long, he’ll be on you, and he can end you quickly, so make sure to heal up quickly if he lands a hit.
Once you’ve done enough damage, Brad will throw down a Rocket Launcher. Pick it up when it’s safe and take careful aim. You’ll have 4 shots, and you can miss, so make sure you have a shot before you fire – but it’ll only take one to fell this monster.

Once your rocket lands, that will be it, and you’ll have completed Resident Evil (HD). Congratulations, you’ve survived, and the Umbrella conspiracy can now be brought to light.
Don’t forget to keep an eye on our Resident Evil Requiem coverage. The events in the Arkley Mountains may be over, but Raccoon City’s story is not over.
FAQs
Is Resident Evil (HD) the most recent remake of RE1?
Yes, Resident Evil (HD) is the most complete and up-to-date remake of Resident Evil 1. Technically, the game is a very polished remaster of the GameCube remake, with new features and controls. But its GameCube roots are still apparent when compared to more modern RE games.
How is Resident Evil (HD) connected to Resident Evil 0?
Resident Evil 0 is a prequel to RE1, set 24 hours before it, detailing what happened to Rebecca and S.T.A.R.S Bravo Team. The game uses the same engine as RE1 and was remastered soon after. The two games are often available as a bundle.
Why does RE1 (HD) feel so different from other Resident Evil games?
Resident Evil (HD) still uses the old, pre-Resident Evil 4 style of the original Resident Evil games. The RE1 remake came out before RE4, so its subsequent remasters still use fixed camera angles and haven’t adopted the ‘over the shoulder’ style viewpoint yet. This is why, despite its brilliance, RE1 (HD) feels slightly out of step with the other REmakes.
Will this guide work if I’m playing as Chris?
Yes. The puzzles and layout of the adventure are the same; Chris has different events and cutscenes, but everything generally flows in the same direction.
Top Adventure Games
More